
If you’ve ever spent hours mixing a song only to play it in your car and think…
“Why does this sound muddy?”
or…
“Why don’t my mixes sound wide and professional?”
You’re not alone.
Almost every beginner audio engineer goes through this exact frustration. You buy new EQ plugins. You download expensive compressors. You start thinking you need analog gear, stereo wideners, or thousands of dollars worth of equipment.
The truth?
You probably don’t need another plugin
You need to understand how frequencies interact inside a mix.
After more than 20 years of recording and mixing music, there’s one simple workflow that completely changed how I approached mixing and it only requires two plugins on your master bus.
If you’re learning to mix in Pro Tools, Ableton Live, Logic Pro, FL Studio, Reaper, Studio One, Cubase, or any other DAW, this technique can dramatically improve your mixes.
Let’s dive in.
Why Beginner Mixes Usually Sound Muddy
One of the biggest mistakes new engineers make is trying to make every instrument sound bigger.
- You grab an EQ.
- Then you boost the kick.
- Boost the bass.
- Boost the guitars.
- Boost the vocals.
- Boost everything.
Eventually, nothing sounds bigger. Everything just sounds crowded. This happens because of something called frequency masking.
What is Frequency Masking?
Frequency masking happens when multiple instruments occupy the same frequency range. Instead of working together, they fight each other.
Common examples include:
- Kick drum vs Bass Guitar
- Rhythm Guitar vs Vocals
- Toms vs Bass
- Cymbals vs Vocal Air
- Piano vs Guitar
When several instruments compete for the same frequencies, your mix becomes:
- Muddy
- Boxy
- Harsh
- Narrow
- Unclear
The solution isn’t boosting more. It’s learning where to cut and how to create space.
Plugin #1: Mix in Mono
This single habit improved my mixes more than almost anything else.
Why Mix in Mono?
Most beginners think stereo makes a mix sound bigger. That’s true but stereo can also hide problems. When instruments are panned left and right, they naturally separate from each other. That makes it harder to hear frequency conflicts.
When you collapse everything into mono. Every instrument is forced into the exact same space.
Suddenly you’ll hear:
- Frequency masking
- Muddy low end
- Harsh midrange
- Instruments disappearing
- Phase problems
Mono exposes every weakness in your mix. That’s exactly why professionals use it.
My Favorite Mono Plugin
Inside Pro Tools, I love the:
Waves S1 Stereo Imager
Instead of widening the stereo image. I actually pull the Width control all the way down until the entire mix becomes mono. If your DAW already includes a Mono button (many do), you don’t even need another plugin.
Examples include:
- Ableton Utility
- Logic Gain Plugin
- Studio One Mixtool
- Cubase MixConvert
- FL Studio Stereo Shaper
Any mono utility works.
If It Sounds Good in Mono, It Usually Sounds Amazing in Stereo
Here’s the goal. Mix your song until everything sounds balanced in mono.
Ask yourself:
- Can I hear the kick?
- Can I hear the snare?
- Is the bass overpowering everything?
- Can I hear every guitar?
- Are instruments covering each other up?
Once everything feels balanced.Turn mono off. Almost instantly your mix will feel:
- Wider
- Cleaner
- Bigger
- More open
- More professional
Not because of a stereo widener, but because every instrument has its own space.
Plugin #2: Use a Frequency Analyzer
The second plugin that completely changed how I mixed was a frequency analyzer. This plugin gives you something your ears alone sometimes can’t, a visual representation of your mix.
“Use Your Ears” Isn’t Always Enough
You’ve probably heard this advice.
“Just use your ears.”
And yes, ultimately your ears make the final decision. But here’s the problem. Most beginners are mixing in:
- Untreated bedrooms
- Living rooms
- Cheap headphones
- Budget monitors
Those listening environments lie to you. Your room might hide bass frequencies. Your headphones might exaggerate highs. Your speakers may not accurately reproduce low end. That’s where a frequency analyzer becomes incredibly valuable.
My Favorite Analyzer Plugin
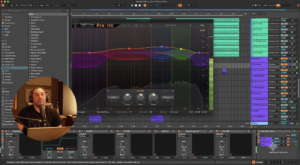
I personally use the Waves PAZ Analyzer.
Instead of leaving it in Peak mode…
I prefer:
- RMS Mode
- Slow Response
- Peak Hold Off
Why? Because music is constantly changing. A slower analyzer lets you observe the overall balance instead of chasing every transient. It becomes much easier to identify:
- Excessive bass
- Missing midrange
- Harsh high frequencies
- Frequency build-up
- Overall tonal balance
What Most Beginners Discover
After using a frequency analyzer for a while…
Almost everyone notices the same thing.
They have WAY too much low end
Even if you can’t hear it, it’s still there. Those sub frequencies force your speakers to work much harder. The speaker cone still has to reproduce that energy.
The result?
- Muddy mixes
- Weak punch
- Poor translation
- Distortion
- Uncontrolled bass
Cleaning up unnecessary low frequencies instantly improves clarity.
My Simple Master Bus Workflow
Here’s the exact workflow I recommend for every beginner.
Steps 1
- Place a Mono Utility plugin on your master bus.
- Place a Frequency Analyzer directly after it.
- Leave every mix plugin OFF (No compressor, No limiter, No saturation, No EQ, Just balance your tracks)
- Listen in mono.
- Pay attention to what disappears.
- Find instruments that fight each other.
- Make small EQ cuts instead of boosting everything.
Step 2
- Turn mono off.
- Enjoy the stereo image naturally opening up.
The Biggest Mixing Lesson I Wish I Learned Earlier
When I first started recording nearly twenty years ago, I thought better mixes came from buying better plugins. I couldn’t have been more wrong. Professional mixes aren’t created because someone owns expensive equipment. They’re created because every instrument has its own place.
Once you understand:
- Frequency masking
- Balance
- Mono compatibility
- Stereo imaging
Everything starts making sense. Your mixes become:
- Wider
- Cleaner
- Punchier
- More detailed
- Easier to finish
Final Thoughts
If you’re just starting your mixing journey, don’t overwhelm yourself with dozens of expensive plugins. Start simple. Put a Mono Utility and a Frequency Analyzer on your master bus. Train your ears. Train your eyes. Learn how instruments work together instead of fighting for space. You’ll develop better habits, faster mixes, and professional results much sooner than if you simply keep buying more gear.
Remember:
If your mix sounds clean in mono, there’s a very good chance it’s going to sound incredible in stereo.
Learn More with Let Down Studio
We’re creating a complete beginner-friendly mixing series designed to teach modern audio production one step at a time. Whether you’re recording your first song or trying to level up your mixes, we’ll walk you through the same techniques we’ve used in the studio for over 20 years.
Follow along as we cover:
- EQ for Beginners
- Compression Made Simple
- Gain Staging
- Recording Better Vocals
- Guitar Mixing
- Drum Mixing
- Master Bus Processing
- Common Mixing Mistakes
- Home Studio Tips
- Professional Mixing Workflows
Stay tuned for more tutorials from Learn with Let Down, where we make professional audio engineering approachable for everyone.